
The Azure Virtual Desktop Series Part 2
Hello everyone, this is the second part of the basics and best practices of Azure Virtual Desktop. Now we are going to configure the hostpool. The most chosen type of desktop in Azure Virtual Desktop is a pooled desktop. So we start with this type of hostpool. When you create a pooled hostpool, it is also possible to setup Remote Apps.
Creating a host pool
We are going to create the hostpool with the Azure portal.
- Sign in to the Azure portal
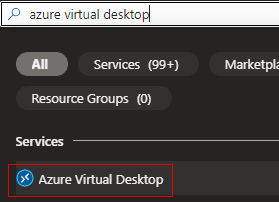
- In the search bar on the top, type Azure Virtual Desktop and select this entry.
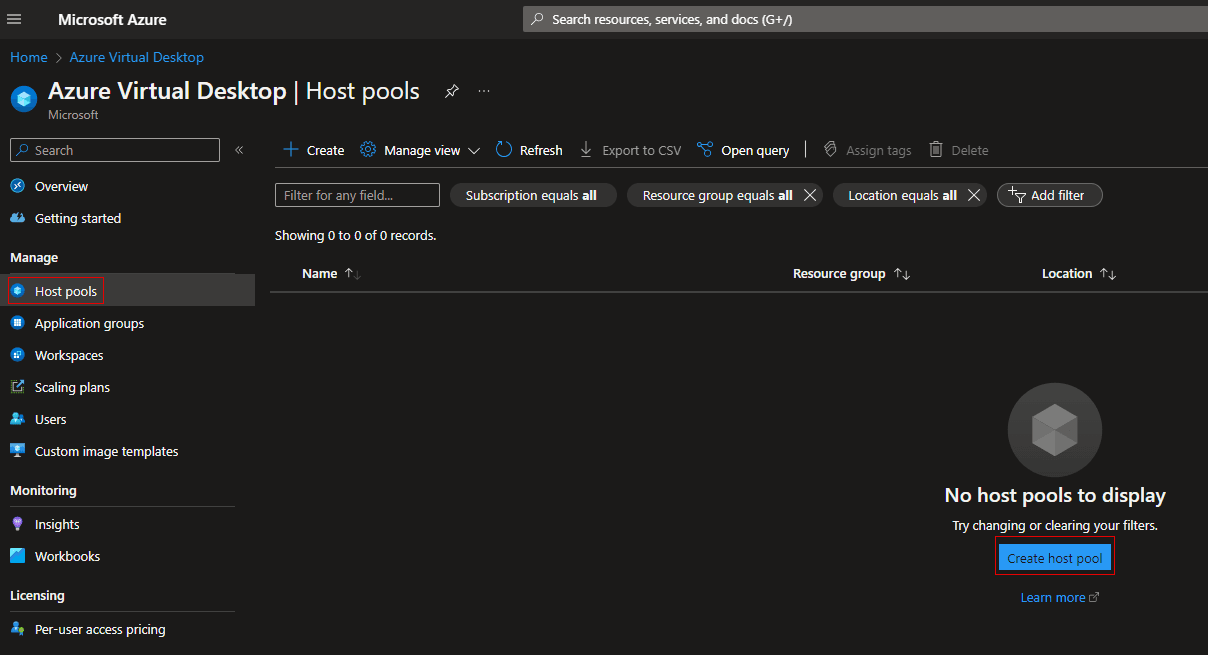
- Select Host Pools, then select Create.
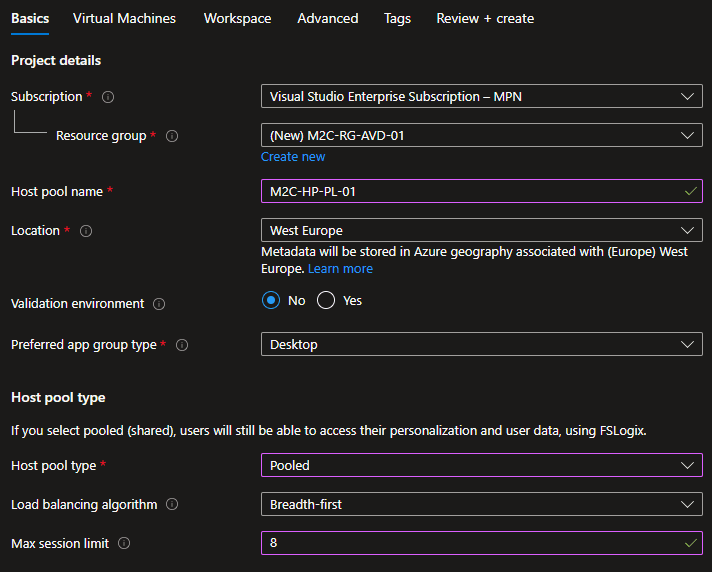
- On the Basics tab, complete the following information.
| Setting | Value |
| Subscription | Select the subscription for Azure Virtual Desktop |
| Resource group | Select an existing resource group or select Create New. – M2C-RG-AVD-01 |
| Host pool name | Enter a name for the host pool – M2C-HP-PL-01 |
| Location | Select the Azure region where your host pool will be deployed. – We select West-Europe, because this region is the closest for me. We want to have no extra latency, when selecting the wrong region. |
| Validation environment | Select Yes or No to create a host pool that is used as a validation environment. – We select No for this setup |
| Preferred app group type | Select the preferred application group type for the host pool: Desktop or Remote App. – We select the Desktop as group type. |
| Host pool type | Personal or Pooled. We select Pooled, but two extra options need to be configured for the host pool. Load balancing algorithm: Breadth-first for session spreading on all session hosts for the best performance or choose Depth-first for less performance but session hosts are filled up to use the Max session limit before an user goes to the next session host, but this setting saves more money in Azure. We choose Breadth-first, because users need to have a good performance when using a full desktop. The setting Max session limit is used to give every session host a maximum concurrent user limit. This can be different for every Azure VM sizing. |
Choosing the right VM size is crucial for the good performance of Azure Virtual Desktop. Please check the following link for the guidance of sizing with different user types.
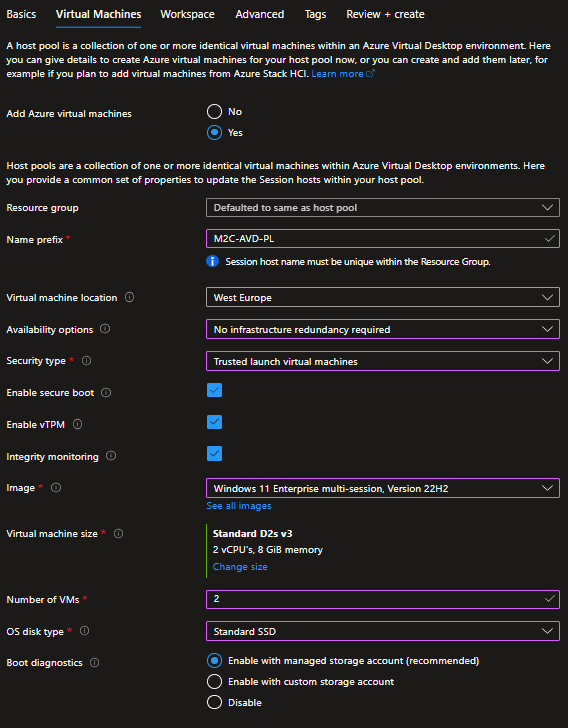
- The next tab going to create the Virtual Machines. First we start with the settings base settings for the Session Hosts.
| Setting | Value |
| Add Azure virtual machines | Select Yes to get more options. |
| Resource group | Selects the resource group created in the Basics tab. |
| Name prefix | Creates the prefix for every session host: M2C-AVD-PL |
| Virtual Machine Location | We choose West-Europe, because this is the closest location for less latency. |
| Availability zones | Here we can select availability zones for redundancy of the session hosts. When you select Availability zones as option, you can create three zones for the session hosts. For this blog we choose No infrastructure redundancy required. |
| Security type | This option sets the security of the session hosts, when using the Confidential virtual machines, only certain types of VM sizing are possible. We are choosing Trusted launch virtual machines for more flexible VM sizing options and good security. |
| Secure Boot | Recommended setting for extra security on your session hosts. protection against bootkits, root kits and kernel level malware. |
| vTPM | Recommended setting for extra security on your session hosts, TPM 2.0 compliant and validates boot integrity apart from securely storing keys and secrets. |
| Integrity monitoring | Recommended setting for extra security on your session hosts. Integrity monitoring enables cryptographic attestation and verification of VM boot integrity along with monitoring alerts if the VM didn’t boot because attestation failed with the defined baseline |
| Image | Choosing Windows 11 Enterprise multi-session (Latest version available) |
| Virtual Machine Size | Standard D2s V3 (Choose the best option for your environment) |
| Number of VMs | 2 (Choose the best option for your environment) |
| OS Disk Type | Standard SSD (Users do not need the performance of Premium disks, when they get their profiles from FSLogix) |
| Boot diagnostics | Enable with managed storage account (We choose the recommended setting) |
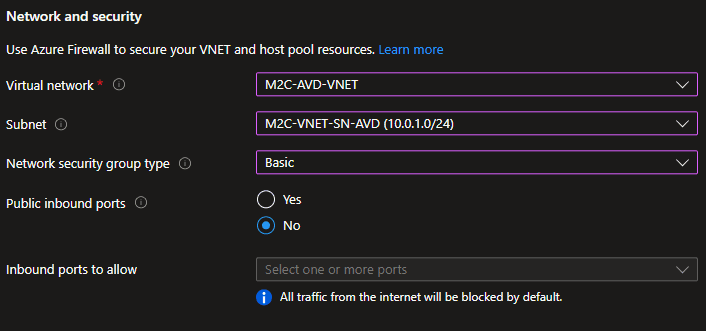
- In the same tab we go to Network and security settings.
| Virtual Network | Choose the previously created VNET from the first part of this blog post series: M2C-AVD-VNET |
| Subnet | Choose the subnets that are available in this Vnet: M2C-VNET-SN-AVD |
| Network Security Group type | For this blog we choose Basic. If you have a NSG specially created for AVD. You can use that with the option Advanced or choose None when you do not need an NSG. |
| Public inbound ports | Recommended setting is No. We do not want extra exposure of the AVD environment on the internet. |
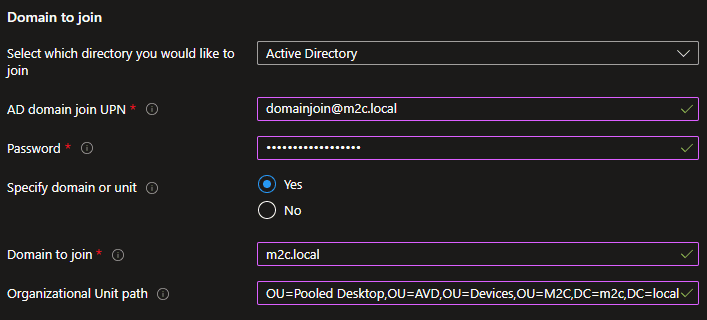
- In the same tab we go to the Domain to join settings.
| Join type of Session hosts | Active Directory (For this blog) |
| AD domain join UPN | domainjoin@m2c.local |
| Password | Please fill in the password of the on-premise account that has the appropriate rights. |
| Specify domain or unit | We will choose Yes for this blog |
| Domain to join | m2c.local |
| Organizational Unit Path | Please use the DN trough the attribute tab of your Active Directory to get this string like this: OU=Pooled Desktop,OU=AVD,OU=Devices,OU=M2C,DC=m2c,DC=local |
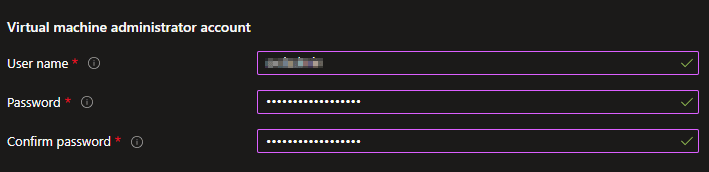
- Here we configure the local admin user of the session hosts.
| User name | Specify account name for local admin access |
| Password | Please fill in the password |
| Confirm Password | Confirm password |
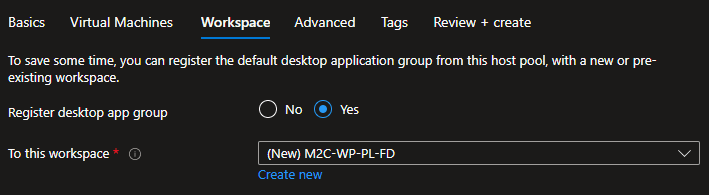
- Now we can click Next en go to the Workspace settings, this step is optional. Here you can simply create a workspace for the hostpool. There can be more workspaces to divide desktops or remote apps for certain groups.
- The next tab is the Advanced tab and this tab is optional, but recommended. To get logging for your AVD environment, it is recommended to use a separate Log Analytics Workspace container and to archive logs to a storage account for troubleshooting purposes which require more history data.
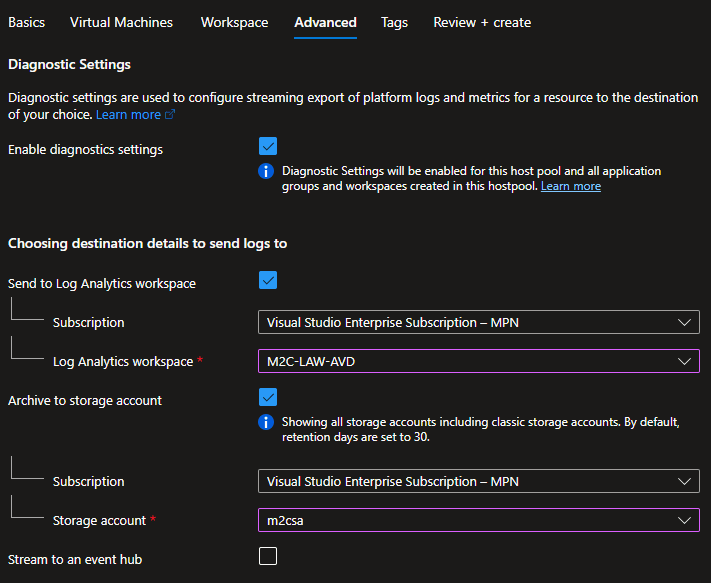
It is possible to setup a Log Analytics Workspace container and a storage account in a new window from your browser. If you switch back and fourth in tabs it will be visible for usage.
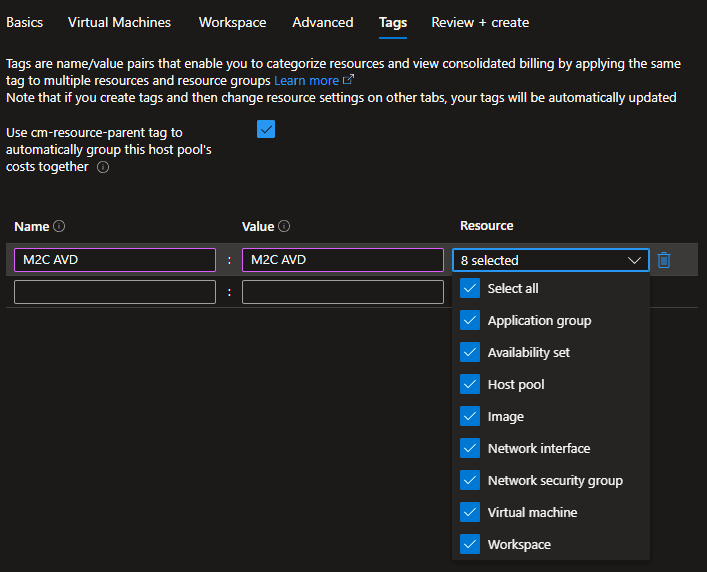
- The last configuration tab is the Tags option. This is very important, because here you can separate your resources with the tags. Maybe a customer want their billing to be only data from Azure Virtual Desktop, or scripts can use tags to manage the environment.
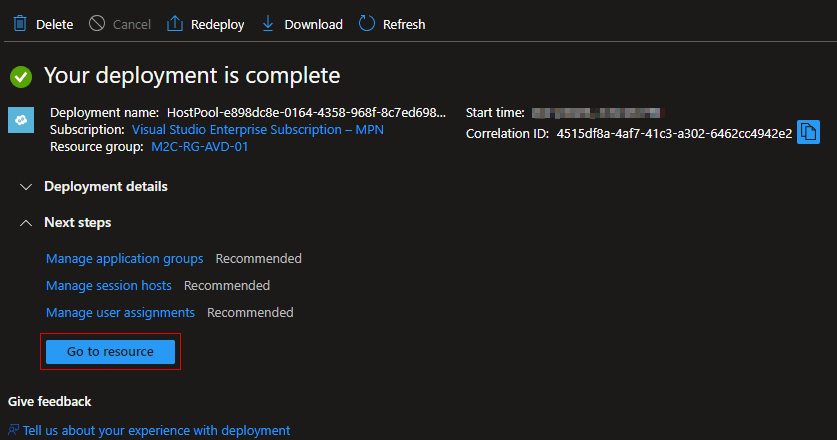
- Everything is ready to configure the AVD environment. Click on Review + Create and when the validation is passed your can click on Create.

- Now that the deployment is a success, the AVD environment is available and ready for the next steps of configuration. You can click on Go to resource to get to your created Hostpool.
The AVD environment is now setup as base environment and still needs some extra configuration to make the connection for the users possible. This will be discussed in the Azure Virtual Desktop Series in Part 3.